
Courses and Grading Tips
Linking Course Sections
If you teach multiple sections of one course, you may want to link them together so that you can manage them as one course.
How to Link Courses
-
Select Courses from the top menu bar and then select My Courses in the top right corner.
-
From the gear menu, select Link Existing Sections.
-
The pop-up window will show courses that can be linked. Sections must have the same course number, administrators, and grading period. If a section is grayed out, it does not match on one or more of these categories.
-
Select the sections you want to link.
-
You will be prompted to download a file of grades, even if you don't have any. Select okay.
CAUTION: This is best done at the beginning of the year especially if you assign and grade work through Schoology. When linking courses, all work, grades, and materials from the linked sections are erased. You will be prompted to download a file of all grades but the grades will not be available through Schoology.


Linking Courses and Skyward
Linking courses in Schoology can be a real time saver when managing your resources, calendar, and assignments. However, for Skyward each course remains separate for grading. There is a small menu in the upper left corner near the course icon. Use this drop down menu to change from one section to another. Be sure you have configured each section independently. You also must Sync Grades for each section. All sections will not sync with one click.


Bulk Edit for Gradebook
There is a Bulk Edit tool available in Schoology grade book. You will find it by clicking the 3 dot menu in the top right corner of your grade book. It will help you quickly find and correct any changes that need to be made for grades to calculate correctly. Remember, all graded items need:
-
to be published
-
to be associated with a grading category
-
to be associated with the correct grading period
-
to use the correct scale or rubric
-
to have the number of points possible set
If you have linked courses, you will be able to see the assignment settings for each course individually. See the example to the right.
Click here for the Schoology support article for Bulk Edit


Automatic Feedback on Test/Quiz
Did you know that you can incorporate automated feedback or provide explanations to your students about the correct and/or incorrect answers on a Schoology Test/Quiz?
You can do this 2 different ways:
1. In True/False and Matching questions, you can provide feedback for each response by clicking Show Feedback. You can even give the students an image, a link to more information, or embed a video as feedback with the Rich-Text editor. You must also set the View Submissions setting to Yes.
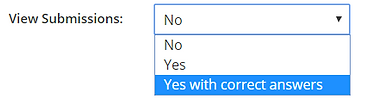
2. In the Settings area in Test/Quiz, you can select View w/ Correct Answers to allow your students to compare their answers with the correct ones.
NOTE: For test security set the View Submissions back to No after students have received feedback. If you leave it yes, students will be able to look back at their submissions even after the course archives.
Check out this how-to video:
Schoology Test Quiz Feedback Video


Student Completion Rules
Student completion rules are requirements placed on course folders and/or course materials that enable teachers to structure the flow of their course, as well as to create self-paced learning for students. The following requirements are available for course folders and material, depending on the item for which you're setting a requirement:
-
Must complete
-
Must view the item
-
Must post a comment/reply
-
Must make a submission
-
Must score at least
